It has been well over 30 years since I last made any kind of tack. Back when I first started showing, nearly everyone made their own tack. Carol Williams'/Rio Rondo's Western Saddle Kit was a godsend to those of us that were clueless about how to make a western saddle <raises hand>. I bought one and made it and while it was OK for back then, it is pretty bad compared to what is being created these days.
I didn't skive the leather lace I used back then (I believe it was calf lace) because it was already pretty thin with nice, finished edges. But the kangaroo lace that tackmakers use these days does need thinning down (skiving). That is a skill I did not learn all those years ago so it is something I needed to learn to do since I am participating in National Model Tack Month on Facebook.
From everything I've watched and read, skiving lace is a necessary skill that will take time to learn how to do properly. I was to expect to ruin a lot of lace before I fully got the hang of it.
So, I got the various knives and cutting devices that I saw the experienced tackmakers used and tried my hand at skiving lace with them....with very mixed results. Yup, I was ruining a lot of lace, which I could not afford to do (I only ordered a small amount for my National Model Tack Month projects which is making halters). There HAD to be a better way!
I am sure others have already figured out how to skive lace this way, but so far I haven't seen a video or read about this technique, so I thought I would share this "discovery" I stumbled my way into.
This might not be a better way for everyone, but this is the technique I came up with that works for ME. Maybe it will work for you, too. (Note: I am not speaking in the video so you don't have to turn up your volume. LOL)
Please forgive the crudeness of the video. I have no real clue on how to make videos, but I hope to learn. Since I don't tell what I doing in the video, I will try to explain further with photos.
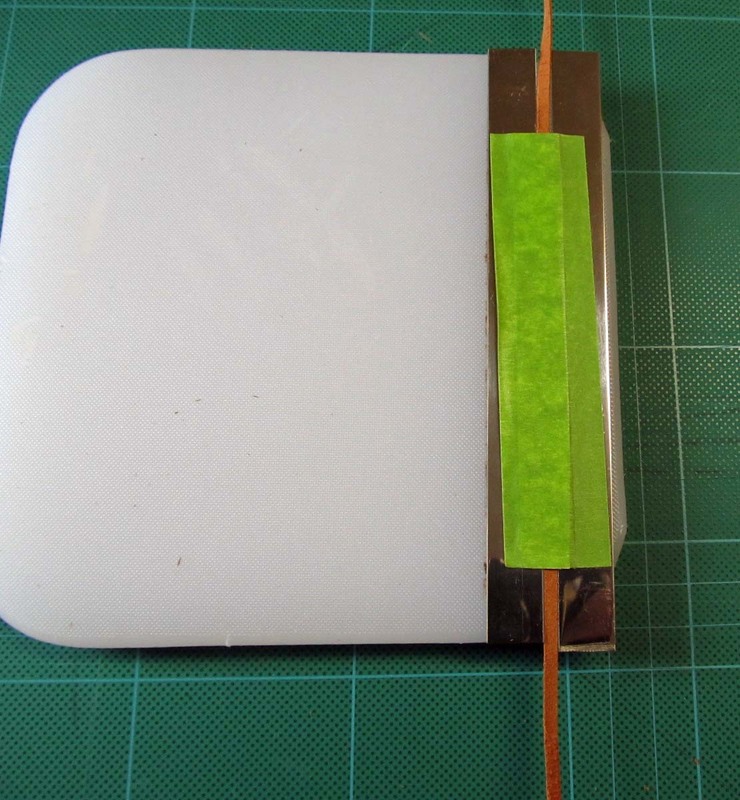
On my poly cutting board (which I bought from Tandy Leather), I have attached two metal strips at the edge with double-sided tape. They are spaced a little wider than the lace I will be skiving. The green and white strip is painter's tape over a piece of cardstock.
Here I have placed the lace I am going to skive, flesh (fuzzy) side up.
Here I am attaching a "cover" over the leather and metal strips to keep the leather feeding through the channel straight and smoothly.
And here is the lace, between the metal guides and held down with cardstock that is secured with painter's tape.
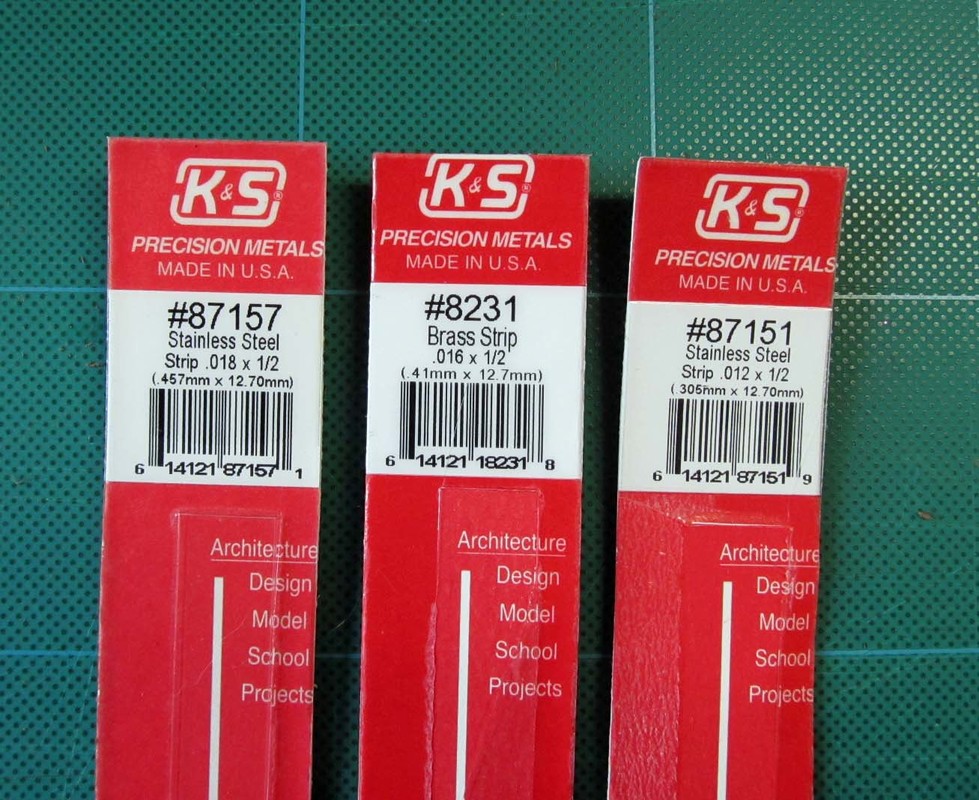
What are those metal strips, you might be wondering? I use 1/2" wide stainless steel and brass strips made by K&S Precision Metals in varying depths to achieve the thinness I am aiming for. They come in 12" lengths, which I cut in half with metal shears. Each 6" length is just the right size for my cutting board.
What are those metal strips, you might be wondering? I use 1/2" wide stainless steel and brass strips made by K&S Precision Metals in varying depths to achieve the thinness I am aiming for. They come in 12" lengths, which I cut in half with metal shears. Each 6" length is just the right size for my cutting board.
First I soften the lace by running it along the edge of the blunt side of a pair of scissors, as you would for curling ribbon. I do this on both sides of the lace to make sure it is very pliable. Then I put the lace between the thickest of the guides and skive as you see in the video. I use a sharp Exacto with the blade held firmly down on the metal guides and then I carefully pull the lace towards me. I skive the lace first one way, then put it back in the guide and skive the other way. I'll do that several times to make sure I've skived it properly at that depth. Then, if I want it thinner, I'll switch to thinner guides and do the process all over again.
It might sound like a lot of fussing and work, but I can skive a lot of lace at pretty much an even depth all the way down the entire length I am skiving and without accidentally cutting through the lace (which I did a million times when trying to skive lace freehand).
When I get the lace pretty close to the thinness I want, I leave it until I actually need to use some and then I fine tune the thinness of the piece I will be using with 240 or 320 grit sandpaper.
I hope this helps some of you who are struggling to evenly and successfully skive leather lace.


 RSS Feed
